
AWS VPC Step by Step: What is VPC in AWS and How to Create It Easily
Cloud computing has changed the way companies build and manage IT infrastructure. Instead of buying physical servers, organizations now use cloud platforms like AWS. One of the most important concepts you must understand in AWS is VPC.
If you are a beginner, don’t worry. In this blog by Lavatech Technology, we will explain AWS VPC Step by Step. You will learn what a VPC is, why it is needed, and how to create it in AWS with clear explanations for every step.
For more information. Click here lavatechtechnology.com
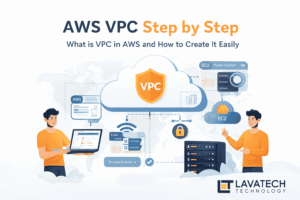
What is VPC in AWS?
VPC stands for Virtual Private Cloud.
A VPC is your own private network inside AWS. Just like companies have their own office network, AWS allows you to create your own network in the cloud using a VPC.
Using AWS VPC Step by Step, you can:
Control IP address range
Create private and public networks
Launch servers securely
Decide who can access your resources
In simple words, VPC gives you full control over your cloud network.
Why Do We Need VPC in AWS?
Without a VPC, you cannot properly secure or manage your cloud resources.
Here is why AWS VPC Step by Step is important:
Keeps your servers private and secure
Controls internet access
Separates public and private resources
Improves security using routing and firewall rules
Used by all real-time AWS projects
Every DevOps engineer, cloud engineer, or AWS learner must understand AWS VPC Step by Step.
Main Components of AWS VPC (Easy Explanation)
Before learning AWS VPC Step by Step creation, let’s understand its main parts:
1. CIDR Block
CIDR block decides the IP address range of your VPC.
Example: 10.0.0.0/16
2. Subnet
A subnet is a smaller network inside a VPC.
Public Subnet → Internet access
Private Subnet → No internet access
3. Internet Gateway
Allows your VPC to connect to the internet.
4. Route Table
Controls how traffic moves inside and outside the VPC.
AWS VPC Step by Step: How to Create VPC in AWS
Now let’s learn AWS VPC Step by Step with easy explanation.
Step 1: Login to AWS Console
Step 2: Go to VPC Dashboard
Search for VPC in services
Click on VPC Dashboard
Step 3: Create a New VPC
Click Create VPC
Choose VPC only
Enter VPC name (example:
Lavatech-VPC)Enter CIDR block: eg.
192.168.0.0/16Click Create VPC
This is the first and most important step in AWS VPC Step by Step process.
Step 4: Create Public Subnet
Go to Subnets
Click Create subnet
Select your VPC
CIDR: eg.
192.168.1.0/24Choose availability zone
Create subnet
Step 5: Create Private Subnet
Repeat subnet creation
CIDR: eg.
192.168.2.0/24This subnet will not have internet access
Step 6: Create Internet Gateway
Go to Internet Gateway
Click Create
Attach it to your VPC
This step enables internet access for public resources.
Step 7: Configure Route Table
Go to Route Tables
Add route:
Destination:
0.0.0.0/0Target: Internet Gateway
Associate route table with public subnet
Step 8: Enable Auto-Assign Public IP
Select public subnet
Enable Auto-assign public IPv4
Step 9: Launch EC2 in VPC
Launch EC2 instance
Select created VPC and subnet
Test connectivity
Your AWS VPC is ready!
Difference Between Public and Private Subnet
| Public Subnet | Private Subnet |
|---|---|
| Internet access | No internet |
| Has Internet Gateway | No Internet Gateway |
Understanding this is crucial in AWS VPC Step by Step concept.
Real-Time Use of AWS VPC
Hosting websites
Running backend applications
Secure databases
Enterprise cloud architecture
All production AWS projects use AWS VPC Step by Step configuration.
Conclusion
AWS VPC is the backbone of cloud networking. Without understanding VPC, you cannot work on real AWS projects.
In this guide, we explained AWS VPC Step by Step so that students, freshers, and beginners can easily understand it. If you want to build a career in AWS or DevOps, learning VPC is not optional — it is mandatory.
At Lavatech Technology, we focus on teaching AWS concepts practically with real-time scenarios so that learners gain confidence and job-ready skills.
For more information. Click here lavatechtechnology.com
Call us on +91 9607331234